
Introduction: Why DIY Home Repairs Matter
Owning a home comes with its fair share of surprises. One day, it’s a leaky faucet. The next, it’s a hole in the drywall from an overly enthusiastic game of indoor soccer. And let’s not even talk about that one wall you painted five years ago that somehow still looks streaky.
Calling a professional for every little issue gets expensive fast, which is why every homeowner should have a few DIY repair skills in their back pocket. The good news? Most common home repairs are easier than you think if you have the right tools and a little know-how.
Welcome to Earnie’s Guide to DIY Home Repairs, where we’ll walk through five essential skills every homeowner should master. From stopping a running toilet to patching up drywall, you’ll be tackling repairs like a pro in no time.
Step 1: Basic Tools Every Homeowner Should Have
Before we dive into repairs, let’s talk tools. You don’t need a professional workshop, but having these essentials on hand will make every job easier:
The Must-Have DIY Tool Kit:
- Adjustable Wrench – Perfect for plumbing fixes and loosening/tightening bolts.
- Screwdriver Set – A mix of flathead and Phillips screwdrivers is a must.
- Claw Hammer – Great for pounding nails, removing old ones, and general household tasks.
- Tape Measure – Because “eyeballing it” doesn’t always end well.
- Level – Ensures shelves and frames aren’t wonky.
- Utility Knife – Cuts through everything from drywall to stubborn packaging.
- Cordless Drill – Speeds up any task that requires screws.
- Pliers (Needle-Nose & Regular) – Good for gripping, bending, and cutting wire.
- Putty Knife – Essential for patching holes in drywall.
- Painter’s Tape – For clean lines when painting.
Nice-to-Have Tools for Bigger Jobs:
- Stud Finder – Avoid drilling into wires or weak spots in the wall.
- Caulking Gun – Perfect for sealing up gaps in bathrooms and kitchens.
- Plunger & Drain Snake – No one wants to deal with a clogged drain unprepared.
Having these tools readily available will make all the difference when tackling household repairs.
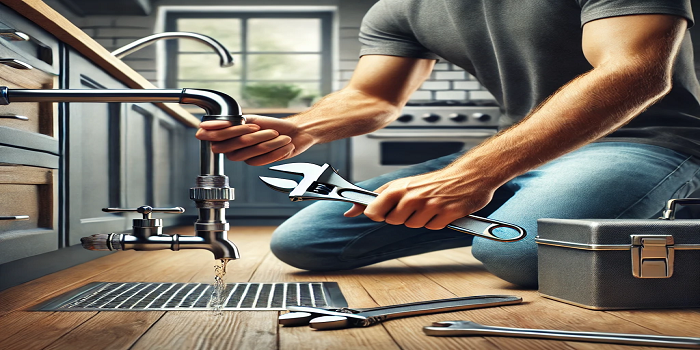
Step 2: Fixing Common Plumbing Issues
Plumbing problems are some of the most common (and annoying) home issues. But before you panic and call a plumber, try these DIY fixes for leaky faucets and running toilets.
How to Fix a Leaky Faucet
Symptoms: Constant dripping, higher water bills.
Tools Needed: Adjustable wrench, replacement washers or cartridges, plumber’s tape.
Step-by-Step Fix:
- Turn off the water supply (usually under the sink).
- Remove the handle and unscrew the cartridge (or washer inside).
- Replace the washer or cartridge with a new one.
- Reassemble and test no more annoying drip!
How to Fix a Running Toilet
Symptoms: Water keeps running, wasting gallons of water.
Tools Needed: Screwdriver, plunger, adjustable wrench.
Step-by-Step Fix:
- Remove the toilet tank lid and check the flapper (the rubber seal at the bottom).
- If the flapper is worn out, replace it it’s a cheap, easy fix!
- If water still runs, check the fill valve and adjust the float.
- Test by flushing if the water stops running, you nailed it!
💡 Pro Tip: Keep a spare toilet flapper and washers in your home they’re cheap and can save you an emergency plumber visit.
Step 3: Patching Drywall Like a Pro
A hole in the wall doesn’t have to be a permanent battle scar. Whether it’s from moving furniture or a wild game of indoor dodgeball, fixing drywall is an easy weekend project.
Fixing Small Holes (Nail or Screw Holes)
Tools Needed: Putty knife, spackling paste, sanding block, paint.
Steps:
- Fill the hole with spackling paste using a putty knife.
- Let it dry completely (check product instructions).
- Sand it smooth with fine-grit sandpaper.
- Touch up with paint good as new!
Fixing Large Holes (Over 2 Inches)
Tools Needed: Drywall patch, joint compound, putty knife, sanding block, paint.
Steps:
- Cut a drywall patch slightly larger than the hole.
- Secure it to the wall using joint compound.
- Smooth it out with a putty knife and let it dry.
- Sand and paint you’ll never know there was a hole!
💡 Pro Tip: If you don’t have a drywall patch, use a thin piece of cardboard or wood backing to support the compound.
Step 4: Painting Tips for a Professional Finish
A fresh coat of paint can transform a room, but if done poorly, it can leave streaks, bubbles, and regrets. Here’s how to do it the right way.
Essential Painting Tips:
- Use high-quality paint and brushes cheap supplies leave streaks.
- Clean and prime the walls to ensure smooth application.
- Use painter’s tape for crisp edges.
- Roll in a “W” pattern to avoid roller marks.
- Apply multiple thin coats rather than one thick one.
💡 Pro Tip: Remove painter’s tape while the paint is still slightly wet to avoid peeling.
Step 5: When to DIY and When to Call a Pro
Some jobs are perfect for DIY, but others require professional expertise to avoid costly mistakes.
DIY-Friendly Repairs:
✅ Fixing leaky faucets
✅ Unclogging drains
✅ Painting walls
✅ Patching small drywall holes
✅ Replacing cabinet hardware
Call a Pro for These Jobs:
🚫 Electrical work beyond changing a light fixture (fire hazard risk).
🚫 Major plumbing overhauls (water damage is expensive).
🚫 Roof repairs (safety hazard).
🚫 Structural changes to walls (you don’t want to accidentally remove a load-bearing wall).
Knowing your limits will save you time, money, and frustration in the long run.
Become a DIY Master
Learning basic home repairs isn’t just about saving money it’s about building confidence and independence as a homeowner. With a few tools and a little patience, you can tackle leaky faucets, patch drywall, paint like a pro, and more.
Now, go fix something!